App/Android
안드로이드 네이게이션 drawer 액티비티 사용법을 정리해보자
Khookie
2021. 9. 18. 18:08
액티비티 탬플릿 생성시 기본 구조
DrawerLayout> 메인레이아웃 > NavigationView(탐색메뉴) > item > Fragment >
사용을 위한 단계
1. 화면별 레이아웃과 프래그먼트를 정의
2. 네비게이션 그래프 파일 생성.
4. 매뉴서랍(DrawerLayout)과 서랍 내부(NavigationView)를 사용해 메인 레이아웃을 구성
5. Nav Host 설정
6. Navigation 메뉴 설정
7. 탐색 동작 설정 (AppBarConfiguratuon 과 NavigarionUI 객체를 사용)
구조 이해를 위한 부분 [빠른 코딩을 원하면 스킵]
액티비티 _메인
<?xml version="1.0" encoding="utf-8"?> <androidx.drawerlayout.widget.DrawerLayout xmlns:android="http://schemas.android.com/apk/res/android" xmlns:app="http://schemas.android.com/apk/res-auto" xmlns:tools="http://schemas.android.com/tools" android:id="@+id/drawer_layout" android:layout_width="match_parent" android:layout_height="match_parent" android:fitsSystemWindows="true" tools:openDrawer="start"> <!--화면 상단 툴바, 플로팅 버튼 등 앱바 레이아웃 포함 --> <include layout="@layout/app_bar_main" android:layout_height="match_parent" android:layout_width="match_parent" /> <!--서랍 안에 네비게이션 뷰와 헤더, 아이디를 통해 뷰파일 연결--> <com.google.android.material.navigation.NavigationView android:id="@+id/nav_view" android:layout_width="wrap_content" android:layout_height="match_parent" android:layout_gravity="start" android:fitsSystemWindows="true" app:headerLayout="@layout/nav_header_main" app:menu="@menu/activity_main_drawer" /> <!--headerLayout 속성에 서랍헤더부분 레이아웃 지정 --> </androidx.drawerlayout.widget.DrawerLayout>
위에 인클루드한
앱_바_ 메인 액티비티
<?xml version="1.0" encoding="utf-8"?> <androidx.coordinatorlayout.widget.CoordinatorLayout xmlns:android="http://schemas.android.com/apk/res/android" xmlns:app="http://schemas.android.com/apk/res-auto" xmlns:tools="http://schemas.android.com/tools" android:layout_width="match_parent" android:layout_height="match_parent" tools:context=".MainActivity"> <!--상단 앱바 --> <com.google.android.material.appbar.AppBarLayout android:layout_width="match_parent" android:layout_height="wrap_content" android:theme="@style/AppTheme.AppBarOverlay"> <androidx.appcompat.widget.Toolbar android:id="@+id/toolbar" android:layout_width="match_parent" android:layout_height="?attr/actionBarSize" android:background="?attr/colorPrimary" app:popupTheme="@style/AppTheme.PopupOverlay" /> </com.google.android.material.appbar.AppBarLayout> <!--진짜 화면 포함--> <include layout="@layout/content_main" /> <!--플로팅 버튼: 선택 가격을 보고 , 식자재 마트로 메시지 전달위한 버튼 , 위치 지정 --> <com.google.android.material.floatingactionbutton.FloatingActionButton android:id="@+id/fab" android:layout_width="wrap_content" android:layout_height="wrap_content" android:layout_gravity="bottom|end" android:layout_margin="@dimen/fab_margin" app:srcCompat="@android:drawable/ic_dialog_email" /> <!--srcCompat 으로 아이콘 이미지 지정 --> </androidx.coordinatorlayout.widget.CoordinatorLayout>
위에 인클루드한
콘텐츠 _ 메인 액티비티
<?xml version="1.0" encoding="utf-8"?> <androidx.constraintlayout.widget.ConstraintLayout xmlns:android="http://schemas.android.com/apk/res/android" xmlns:app="http://schemas.android.com/apk/res-auto" xmlns:tools="http://schemas.android.com/tools" android:layout_width="match_parent" android:layout_height="match_parent" app:layout_behavior="@string/appbar_scrolling_view_behavior" tools:showIn="@layout/app_bar_main"> <!--네임에 액자 역할 프래그먼트 (NavHostFragment) 임을 지정 디펄트 네브호스트 true로 지정하여 백버튼 활용가능하도록 합니다 navGraph 지정 --> <fragment android:id="@+id/nav_host_fragment" android:name="androidx.navigation.fragment.NavHostFragment" android:layout_width="match_parent" android:layout_height="match_parent" app:defaultNavHost="true" app:layout_constraintLeft_toLeftOf="parent" app:layout_constraintRight_toRightOf="parent" app:layout_constraintTop_toTopOf="parent" app:navGraph="@navigation/mobile_navigation" /> </androidx.constraintlayout.widget.ConstraintLayout>
그렇다면 콘텐츠 메인 화면에 보여줄 화면을 어떻게 지정하느냐
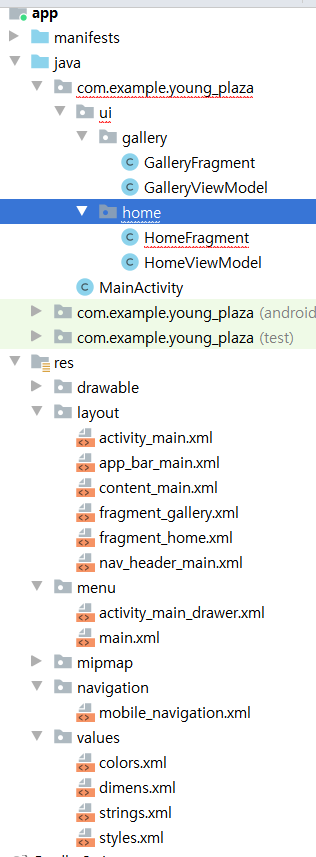
기본적으로 템플릿에 구성되어있는 프래그먼트.xml 화면
<?xml version="1.0" encoding="utf-8"?> <androidx.constraintlayout.widget.ConstraintLayout xmlns:android="http://schemas.android.com/apk/res/android" xmlns:app="http://schemas.android.com/apk/res-auto" xmlns:tools="http://schemas.android.com/tools" android:layout_width="match_parent" android:layout_height="match_parent" tools:context=".ui.gallery.GalleryFragment"> <!--context 속성에 프래그먼트자바 파일이 연결되어 있다--> <TextView android:id="@+id/text_gallery" android:layout_width="match_parent" android:layout_height="wrap_content" android:layout_marginStart="8dp" android:layout_marginTop="8dp" android:layout_marginEnd="8dp" android:textAlignment="center" android:textSize="20sp" app:layout_constraintBottom_toBottomOf="parent" app:layout_constraintEnd_toEndOf="parent" app:layout_constraintStart_toStartOf="parent" app:layout_constraintTop_toTopOf="parent" /> </androidx.constraintlayout.widget.ConstraintLayout>
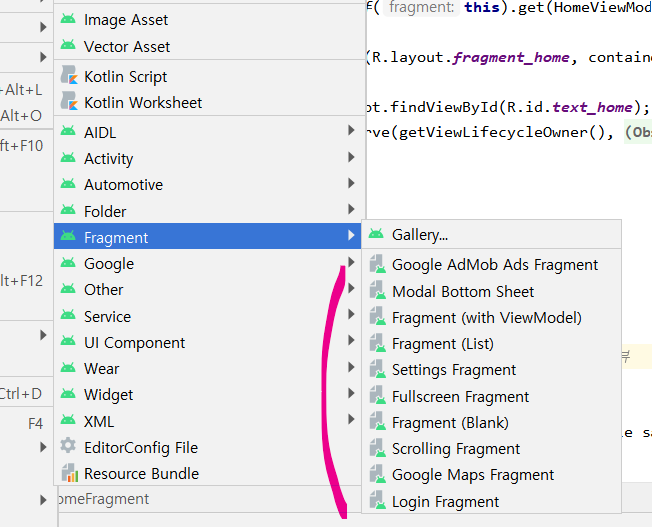
프래그먼트 추가하는법
app 폴더 우클릭 - new- Fragment - 원하는 프래그먼트
~~프래그먼트. java 파일 형식
package com.example.young_plaza.ui.home;

import android.os.Bundle;
import android.view.LayoutInflater;
import android.view.View;
import android.view.ViewGroup;
import android.widget.ListView;
import android.widget.TextView;

import androidx.annotation.NonNull;
import androidx.annotation.Nullable;
import androidx.fragment.app.Fragment;
import androidx.lifecycle.Observer;
import androidx.lifecycle.ViewModelProviders;

import com.example.young_plaza.R;

public class HomeFragment extends Fragment {

//    private HomeViewModel homeViewModel;


    public View onCreateView(@NonNull LayoutInflater inflater,
                             ViewGroup container, Bundle savedInstanceState) {
      //  homeViewModel =
       //         ViewModelProviders.of(this).get(HomeViewModel.class);

        View root = inflater.inflate(R.layout.fragment_home, container, false); //부분적으로 화면을 가져오는 부분

       // final TextView textView = root.findViewById(R.id.text_home);
       // homeViewModel.getText().observe(getViewLifecycleOwner(), new Observer<String>() {
        //    @Override
         //   public void onChanged(@Nullable String s) {
         //       textView.setText(s);
         //   }
         //  }); 뷰모델 사용 부분이라 주석처리
        return root;
    }


    //이 클래스 안에서만 사용하기 위해 프라이빗으로 지정합니다
    //객체 변수 만들기
   private ListView shopListv; //쇼핑가능한 목록을 출력할 리스트뷰

    @Override
    public void onViewCreated(@NonNull View view, @Nullable Bundle savedInstanceState) {
        super.onViewCreated(view, savedInstanceState);

       //자원을 가져오는 부분, 중요한점은 프래그먼트에선 view.findViewById 로 사용해야 한다는것
        shopListv = view.findViewById(R.id.shopListView);
        //자원을 사용하여 작업을 해야하는 부분

        shopListv.setDivider();

    }
}
이렇게 일반적인 방법과 비슷하게 프래그먼트 액티비티.xml 과 작동을 하는 프래그먼트 .java 파일을 만들어 주면
[1]번 과정이 끝난다
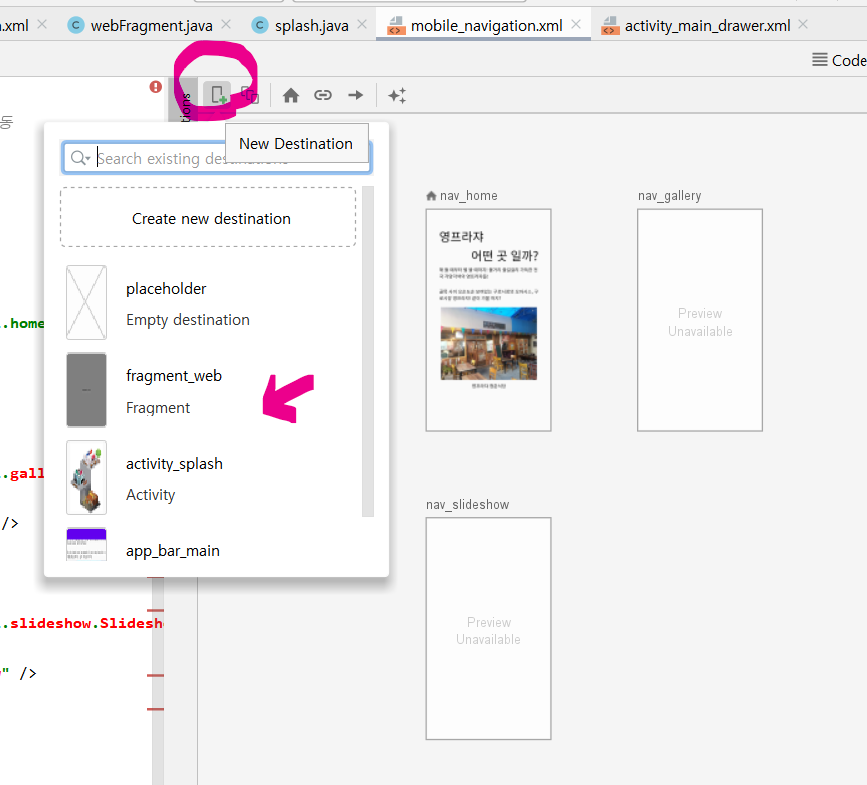
네비게이션 폴더의 mobile_navigation파일 (네비게이션 그래프 )
<?xml version="1.0" encoding="utf-8"?> <navigation xmlns:android="http://schemas.android.com/apk/res/android" xmlns:app="http://schemas.android.com/apk/res-auto" xmlns:tools="http://schemas.android.com/tools" android:id="@+id/mobile_navigation" app:startDestination="@+id/nav_home"> <!--네비게이션 그래프 xml 이라고도 합니다 startDestinatio을 지정하여 첫화면을 지정해줍니다--> <!--이동관계에 있는 화면들을 넣어줍니다--> <!--홈에서 출발 --> <!--각 프래그먼트에 지정된 id를 통해 메뉴파일에서 이동 name 값에 지정된것은 프래그먼트별 java클래그 label 값으로는 타이틀바에 보일 내용을 작성 layout 으로 실제 프래그먼트 화면을 적용 --> <fragment android:id="@+id/nav_home" android:name="com.example.young_plaza.ui.home.HomeFragment" android:label="@string/menu_home" tools:layout="@layout/fragment_home" /> <fragment android:id="@+id/nav_gallery" android:name="com.example.young_plaza.ui.gallery.GalleryFragment" android:label="@string/menu_gallery" tools:layout="@layout/fragment_gallery" /> <fragment android:id="@+id/nav_slideshow" android:name="com.example.young_plaza.ui.slideshow.SlideshowFragment" android:label="@string/menu_slideshow" tools:layout="@layout/fragment_slideshow" /> </navigation>
탐색(네비게이션 이동) 을 적용하려면
네비게이션 그래프 파일에서 design 모드로 들어가 위쪽 이 아이콘을 눌러주세요